• Stitches!
Make your own garments! See how you can channel your creativity into beautiful womenswear designs.
• Rock Of Eye
Menswear technique! Follow our new process flow and learn how to make complex bespoke garments!

Your Tailoring Academy
Make your own garments! See how you can channel your creativity into beautiful womenswear designs.
Menswear technique! Follow our new process flow and learn how to make complex bespoke garments!
Learning about design and tailoring is a life-long journey. And it has to be structured! These are the five steps we have created especially for you.
Are you an absolute beginner? Or more advanced and experienced within your field? We can help you understand complex routines, take some of that work load of your back, or maybe just inspire you to reach new and exciting goals?
Contact Alexander@StenMartin.com and tell us what you need. We will guide you through the process, and answer all your questions.

How did it go yesterday? Did you finish those two pattern pieces? Great! So let’s continue our pattern-making!
Remember that the pattern-pieces we have to make for this denim jacket are quite many. Actually fourteen of them! Here’s a list…
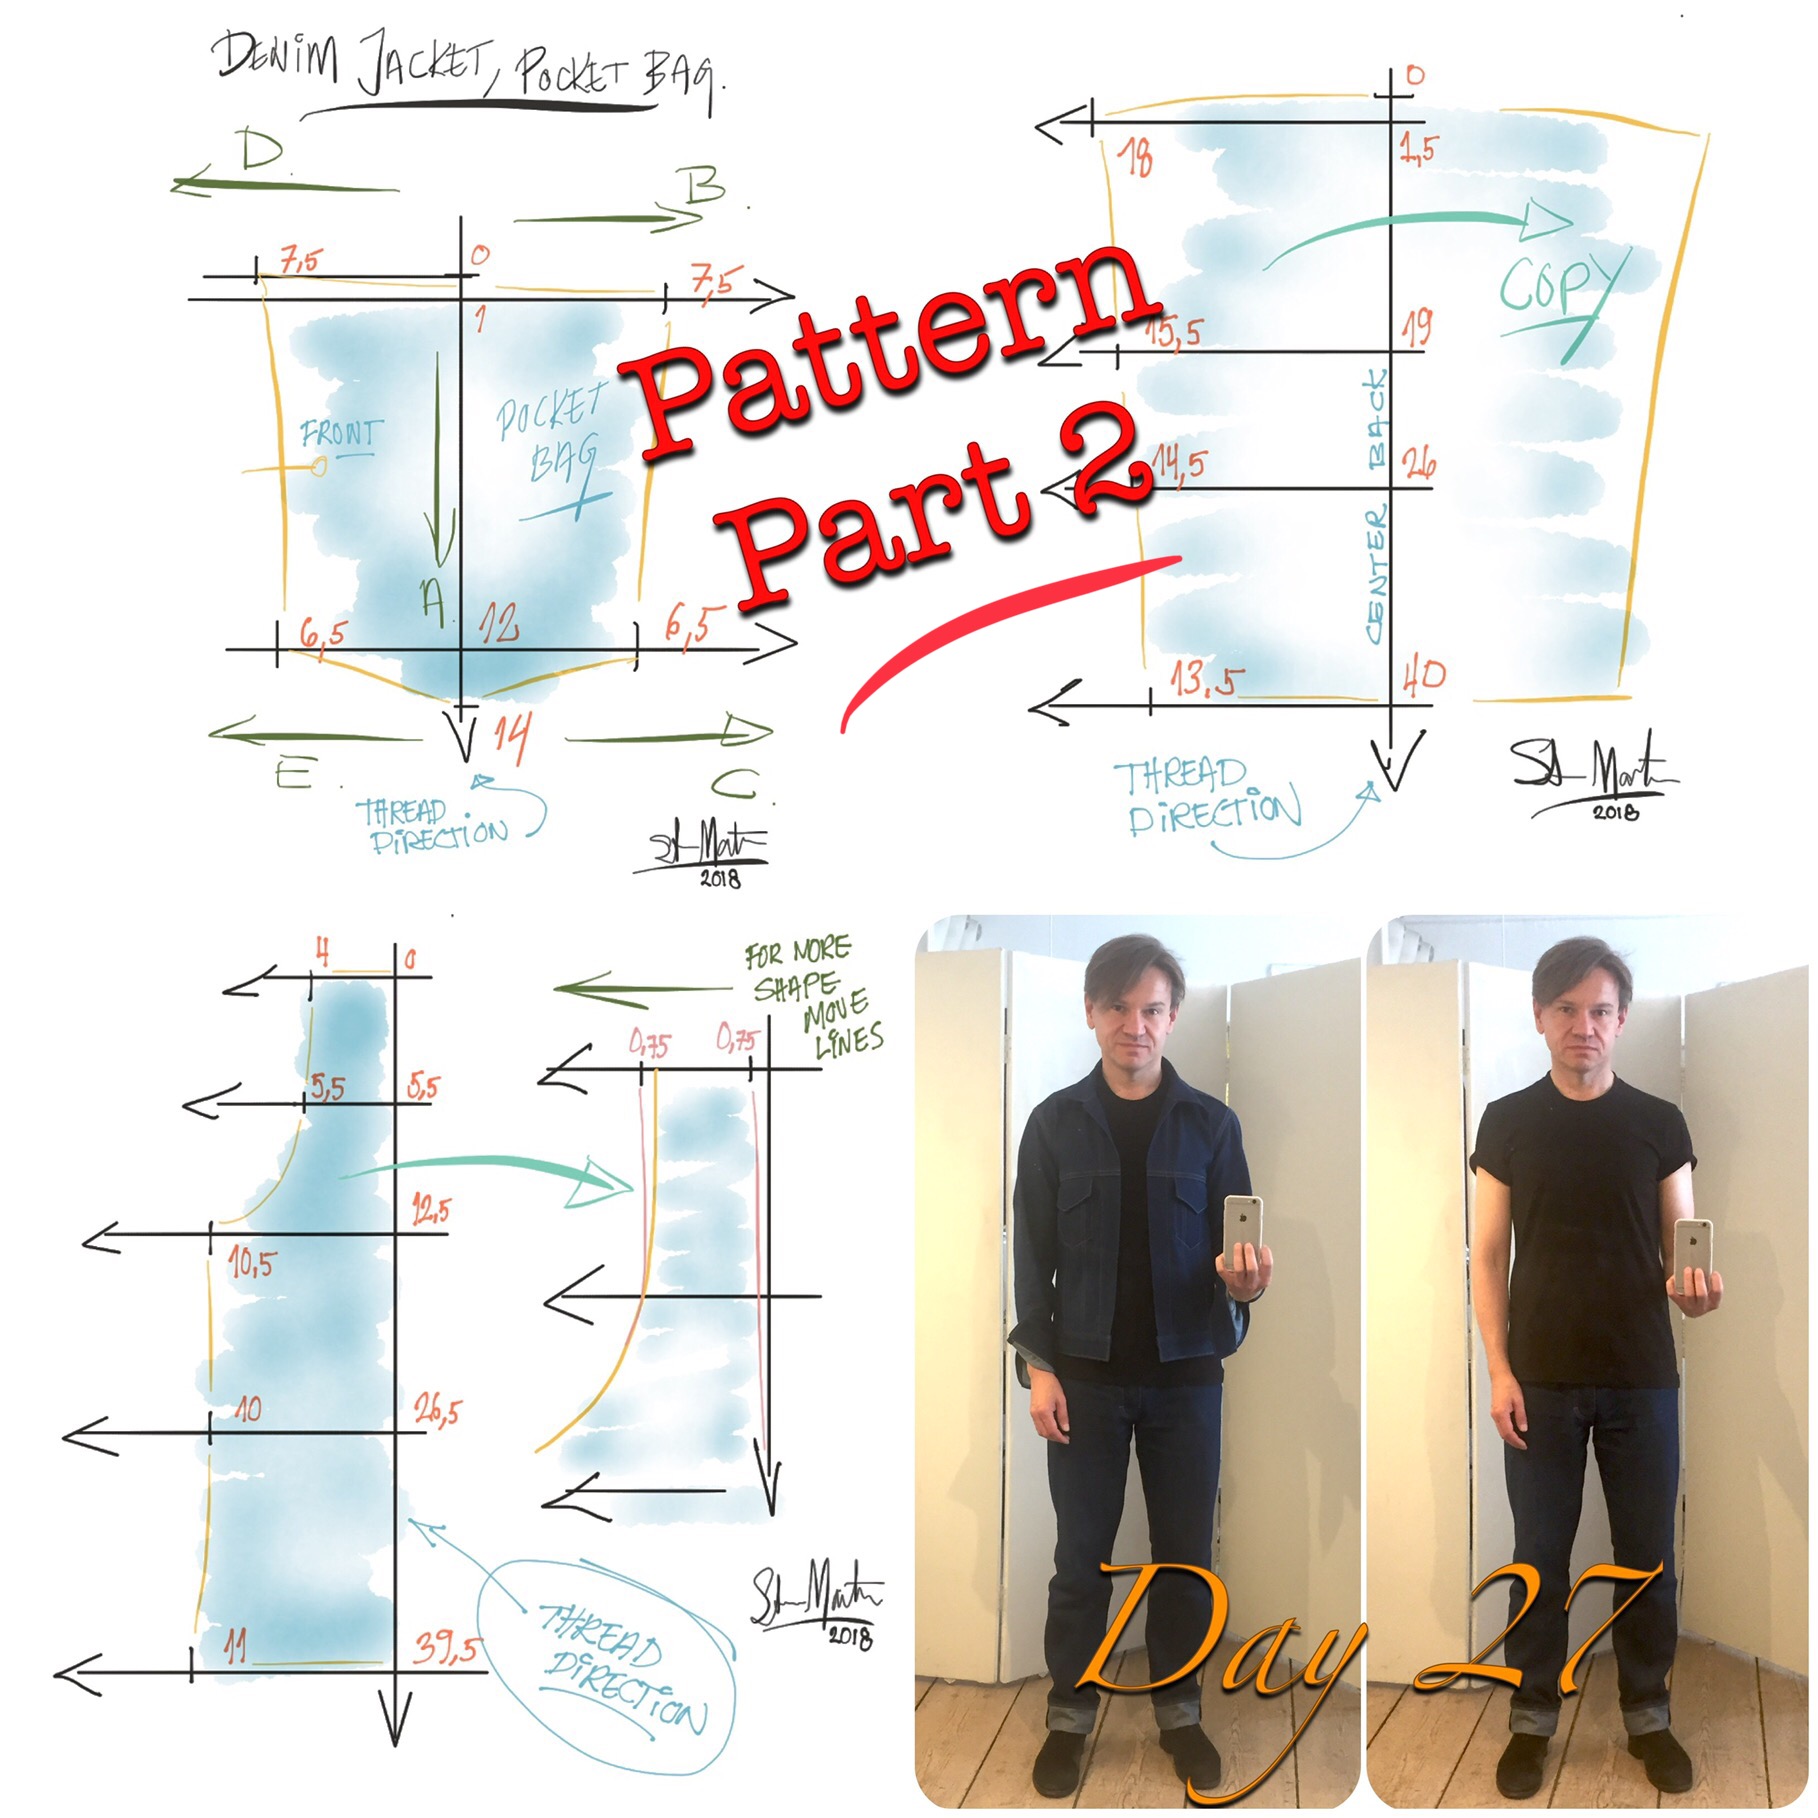
Two of them we already made yesterday. The Pocket Flap and the Yoke. Here are three more!
When lways start with your vertical center line (A), which also works as the thread direction. Then place the measurements on that line, starting at the top with 0 (zero) and going downwards, here with 1 cm, 12 cm, and 14 cm continuously.
Draw lines to the side, both left and right, and also place measurements here. And finish off with drawing the outline of the pattern piece, going from mark to mark, preferable using a ruler. All done! Time for the next one!
Here’s the center back. It’s practical to just draw half of the pattern piece, and then fold the paper and copy the first side over to the other side.
Remember that the shape of these sketches are not accurate. They just show how to make it and suggests the shape for you. Knowing that, you can use the same sketches for different sizes by just alternating the numbers in the drawing. So make sure you don’t expect the exact same shape – just something similar.
Finally the Side Back! Her you can alternate the pattern for a rounder back if you’d like. Just re-shape the top of the pattern piece somewhat, by shifting it slightly to the left. In that way you’ll creating a hidden dart in the seam when stitching it together with the center back piece later on. It’s up to you if you want to use this alternation or not.
Good luck with the pattern pieces! Above is today’s project combination. See you tomorrow for more construction drawings!
– Sten Martin / DTTA
__________
If you enjoyed this content, feel free to support us by sharing this article, subscribe to one or two of our different platforms with informative content on tailoring and design, or, by just donating a sum. As a small independent company, we’re always greatful for your support!

Let’s dig into how to construct a pattern! Today’s just the soft warm-up, so we will only concentrate on the basics. See it as an intro, and then practice on your technique for tomorrow’s next lecture!
Remember that if you think it’s all a bit complicated and want to get more thourogh explanations, please feel free to contact Alexander@StenMartin.com for the subscription version, where you can discuss all topics with me further.
Let’s do this!
First, look at these images a drew for you here below.
They explain how a pocket flap can be measured up. It’s just a thought example to get you into the right mood. So just read on and look at the images at the same time. Take your time! Don’t hurry. It’s important to understand the concept.
=&0=&Imagine a line all through the center of the pattern piece. This is the thread line – the direction of the fabric.
=&1=&To detect the pocket flap’s corner placements we need to make another line with straight angle (90 degrees) to the first line, that crosses exactly that corner.
=&2=&Now you’re able to measure the different sides and lines.
So why do I need the basic crossing lines then? Well that’s explained here down below. You need them to be able to balance the whole pattern piece while you’re constructing it from scratch!
Look below for the next thought example.
=&0=&First you got a template. A description if you like. It’s here you get all your information. This is just for being “read” and understood. It’s almost always drawn as a miniature.
=&1=&Then you take a larger piece of paper and start drawing your own pattern piece in natural size! Start with the two crossed lines and make sure they are placed in a true angle with each other.
=&2=&Place the measurements on the lines. They are marked in centimeters. 4 cm up. 2 cm down. And 7,5 cm to the side.
=&6=&Draw the outline of the pattern piece. Preferably use a ruler.
=&7=&Fold the paper in the center line and copy the first (drawn) side over to the other side. All done! Yes! Bravo!
There are some different ways to make these constructions. Look here below on a really old template from the 18th century!
Here you can see that the center line is drawn at the outside of the pattern, and the measurements start at the top with a zero (0), and then counts downwards first, and then continues out to the right side. With all the measurements continuously marked.
Let’s try that! See here below, and try to draw your own pattern pieces!
Here are two pattern pieces presented!
=&0=&The Pocket Flap. Start at the top and draw the line downwards along the A direction and place the measurements 0 (zero), 4 and 6 cm (measured continuously).
Then draw the lines to the left along the B direction. Place 15 cm on the top line. Then also place 15 cm on the next line. And finally place 7,5 cm on the lowest line. Finish off with connecting all the markings with a nice outline. Preferably use a ruler. Yes! A pocket flap! And in the exact right size. Without the use of a computer program. Congratulations! You did it!
=&1=&The Yoke. Now it’s time for you to practice! Try to make your very own pattern piece by using the diagram above. Take your time and make it neat and proper. And then there will be more to practice on tomorrow!
Today’s combination of the Thousand Days Of Hope And Glory project – the 26th day. Here you can clearly see the pocket flap that you just made! Fantastic, right? And you can see a tiny little bit of the back yoke right up at the shoulder, just next to the collar!
See you tomorrow! And good luck with your constructions!
– Sten Martin / DTTA
__________
If you enjoyed this content, feel free to support us by sharing this article, subscribe to one or two of our different platforms with informative content on tailoring and design, or, by just donating a sum. As a small independent company, we’re always greatful for your support!

Time for a new segment – Twelwe Days Of The C3 Blue Denim Jacket! During this segment we will look into how to actually make a jacket like this, from start, to end product.
The first day will be this project’s 25th day, and the last will be the 36th day (the last day of new combinations with the garments I currently have).
So what actually is this garment then? Basically C3 is my third “covering” garment – where the C represent cover, as in “to cover the garments worn next to the skin” . These C-labeled items could be jackets, coats and sweaters, and should be able to easily be taken off and on to regulate the owner’s body temperature.
A denim jacket is also what I call a one-layer garment. Explained, you could say is’s a “you get what you see” item. There’s no lining, no interlining, no advanced pocket constructions, and no hidden seams. It’s a basic garment made of a basic fabric. That’s why a good shape, a good fabric, and precise seams are important, in my opinion – becase, as said before, that’s just about all you get. (And that’s also why I make hand-stitched buttonholes in them – to give them that extra special luxury feel, and durability.)
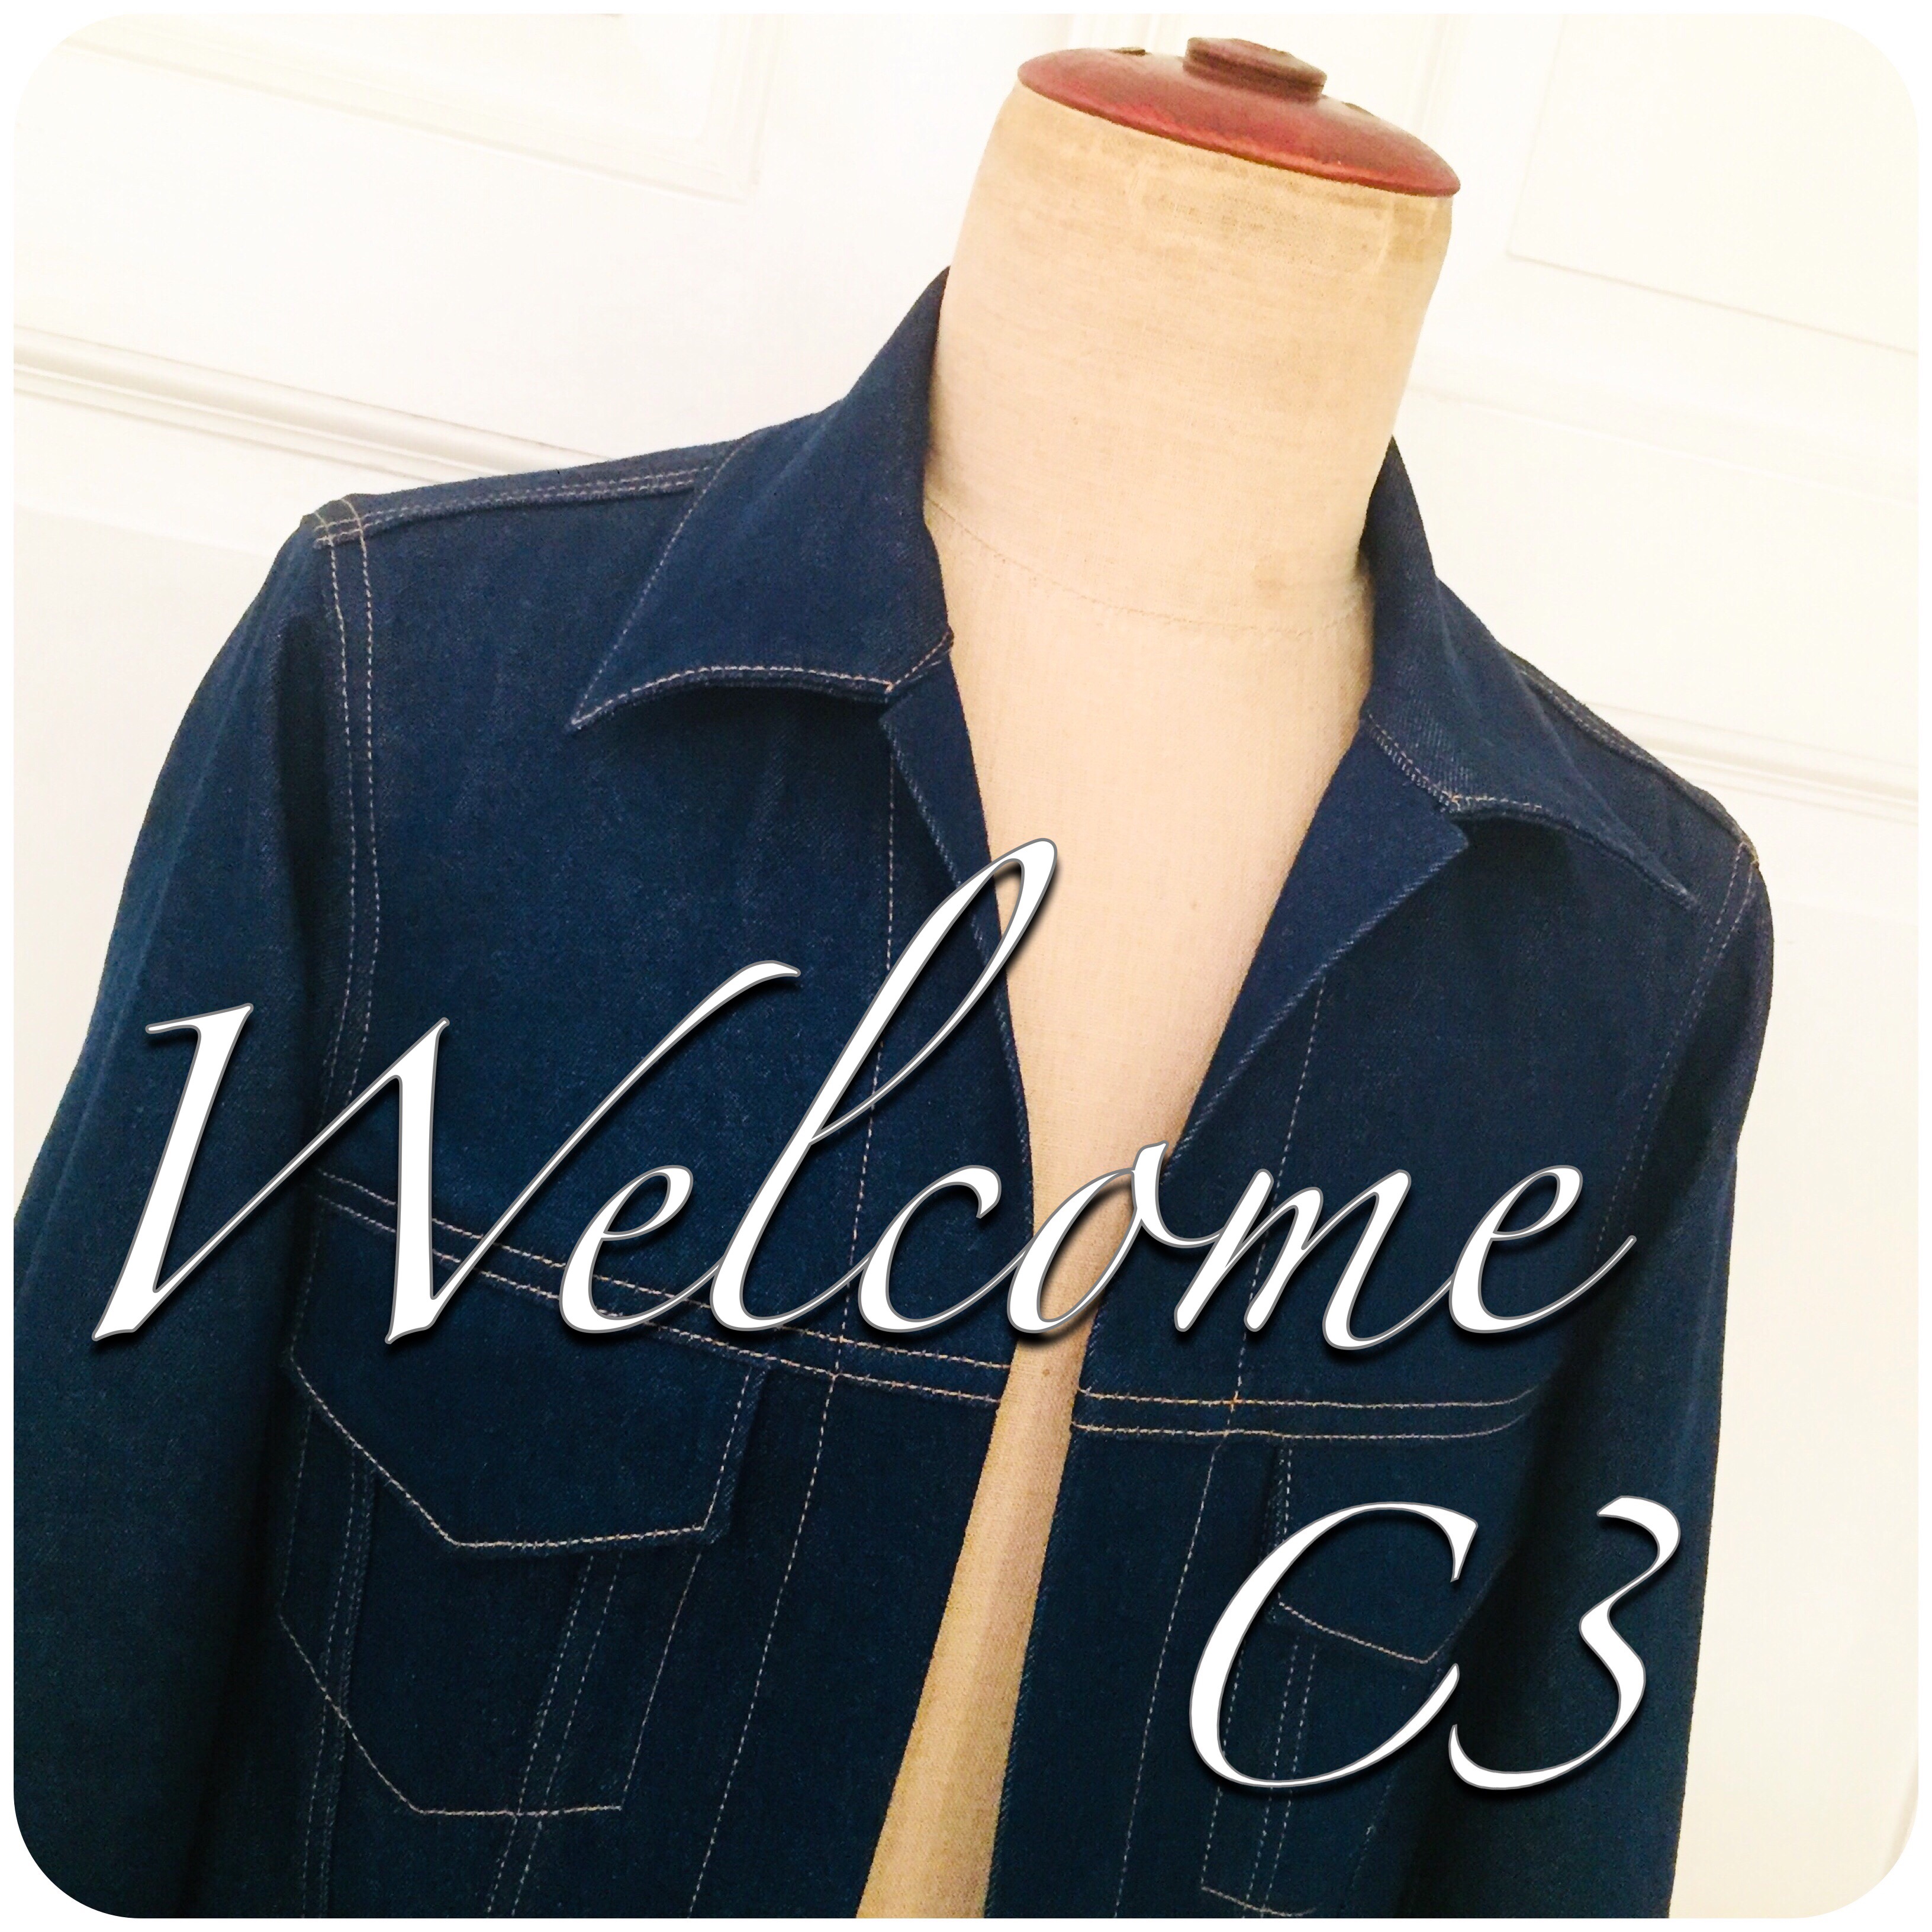
Here’s me wearing the C3 denim jacket for the first time, below, together with my matching B2 jeans, made previously in the same fabric. Tomorrow we will look into an easy way of how to make a pattern for this jacket.
Let’s do this! See you tomorrow!
– Sten Martin / DTTA
__________
If you enjoyed this content, feel free to support us by sharing this article, subscribe to one or two of our different platforms with informative content on tailoring and design, or, by just donating a sum. As a small independent company, we’re always greatful for your support!
+45 28 30 64 95
Alexander will answer all your questions about us being a partner in your evolvement within the luxury garment production area. Feel free to contact us!