


Let’s dig into how to construct a pattern! Today’s just the soft warm-up, so we will only concentrate on the basics. See it as an intro, and then practice on your technique for tomorrow’s next lecture!
Remember that if you think it’s all a bit complicated and want to get more thourogh explanations, please feel free to contact Alexander@StenMartin.com for the subscription version, where you can discuss all topics with me further.
Let’s do this!
First, look at these images a drew for you here below.

They explain how a pocket flap can be measured up. It’s just a thought example to get you into the right mood. So just read on and look at the images at the same time. Take your time! Don’t hurry. It’s important to understand the concept.
1. Imagine a line all through the center of the pattern piece. This is the thread line – the direction of the fabric.
2. To detect the pocket flap’s corner placements we need to make another line with straight angle (90 degrees) to the first line, that crosses exactly that corner.
3. Now you’re able to measure the different sides and lines.
So why do I need the basic crossing lines then? Well that’s explained here down below. You need them to be able to balance the whole pattern piece while you’re constructing it from scratch!
Look below for the next thought example.

1. First you got a template. A description if you like. It’s here you get all your information. This is just for being “read” and understood. It’s almost always drawn as a miniature.
2. Then you take a larger piece of paper and start drawing your own pattern piece in natural size! Start with the two crossed lines and make sure they are placed in a true angle with each other.
3. Place the measurements on the lines. They are marked in centimeters. 4 cm up. 2 cm down. And 7,5 cm to the side.
4. Draw the outline of the pattern piece. Preferably use a ruler.
5. Fold the paper in the center line and copy the first (drawn) side over to the other side. All done! Yes! Bravo!
There are some different ways to make these constructions. Look here below on a really old template from the 18th century!
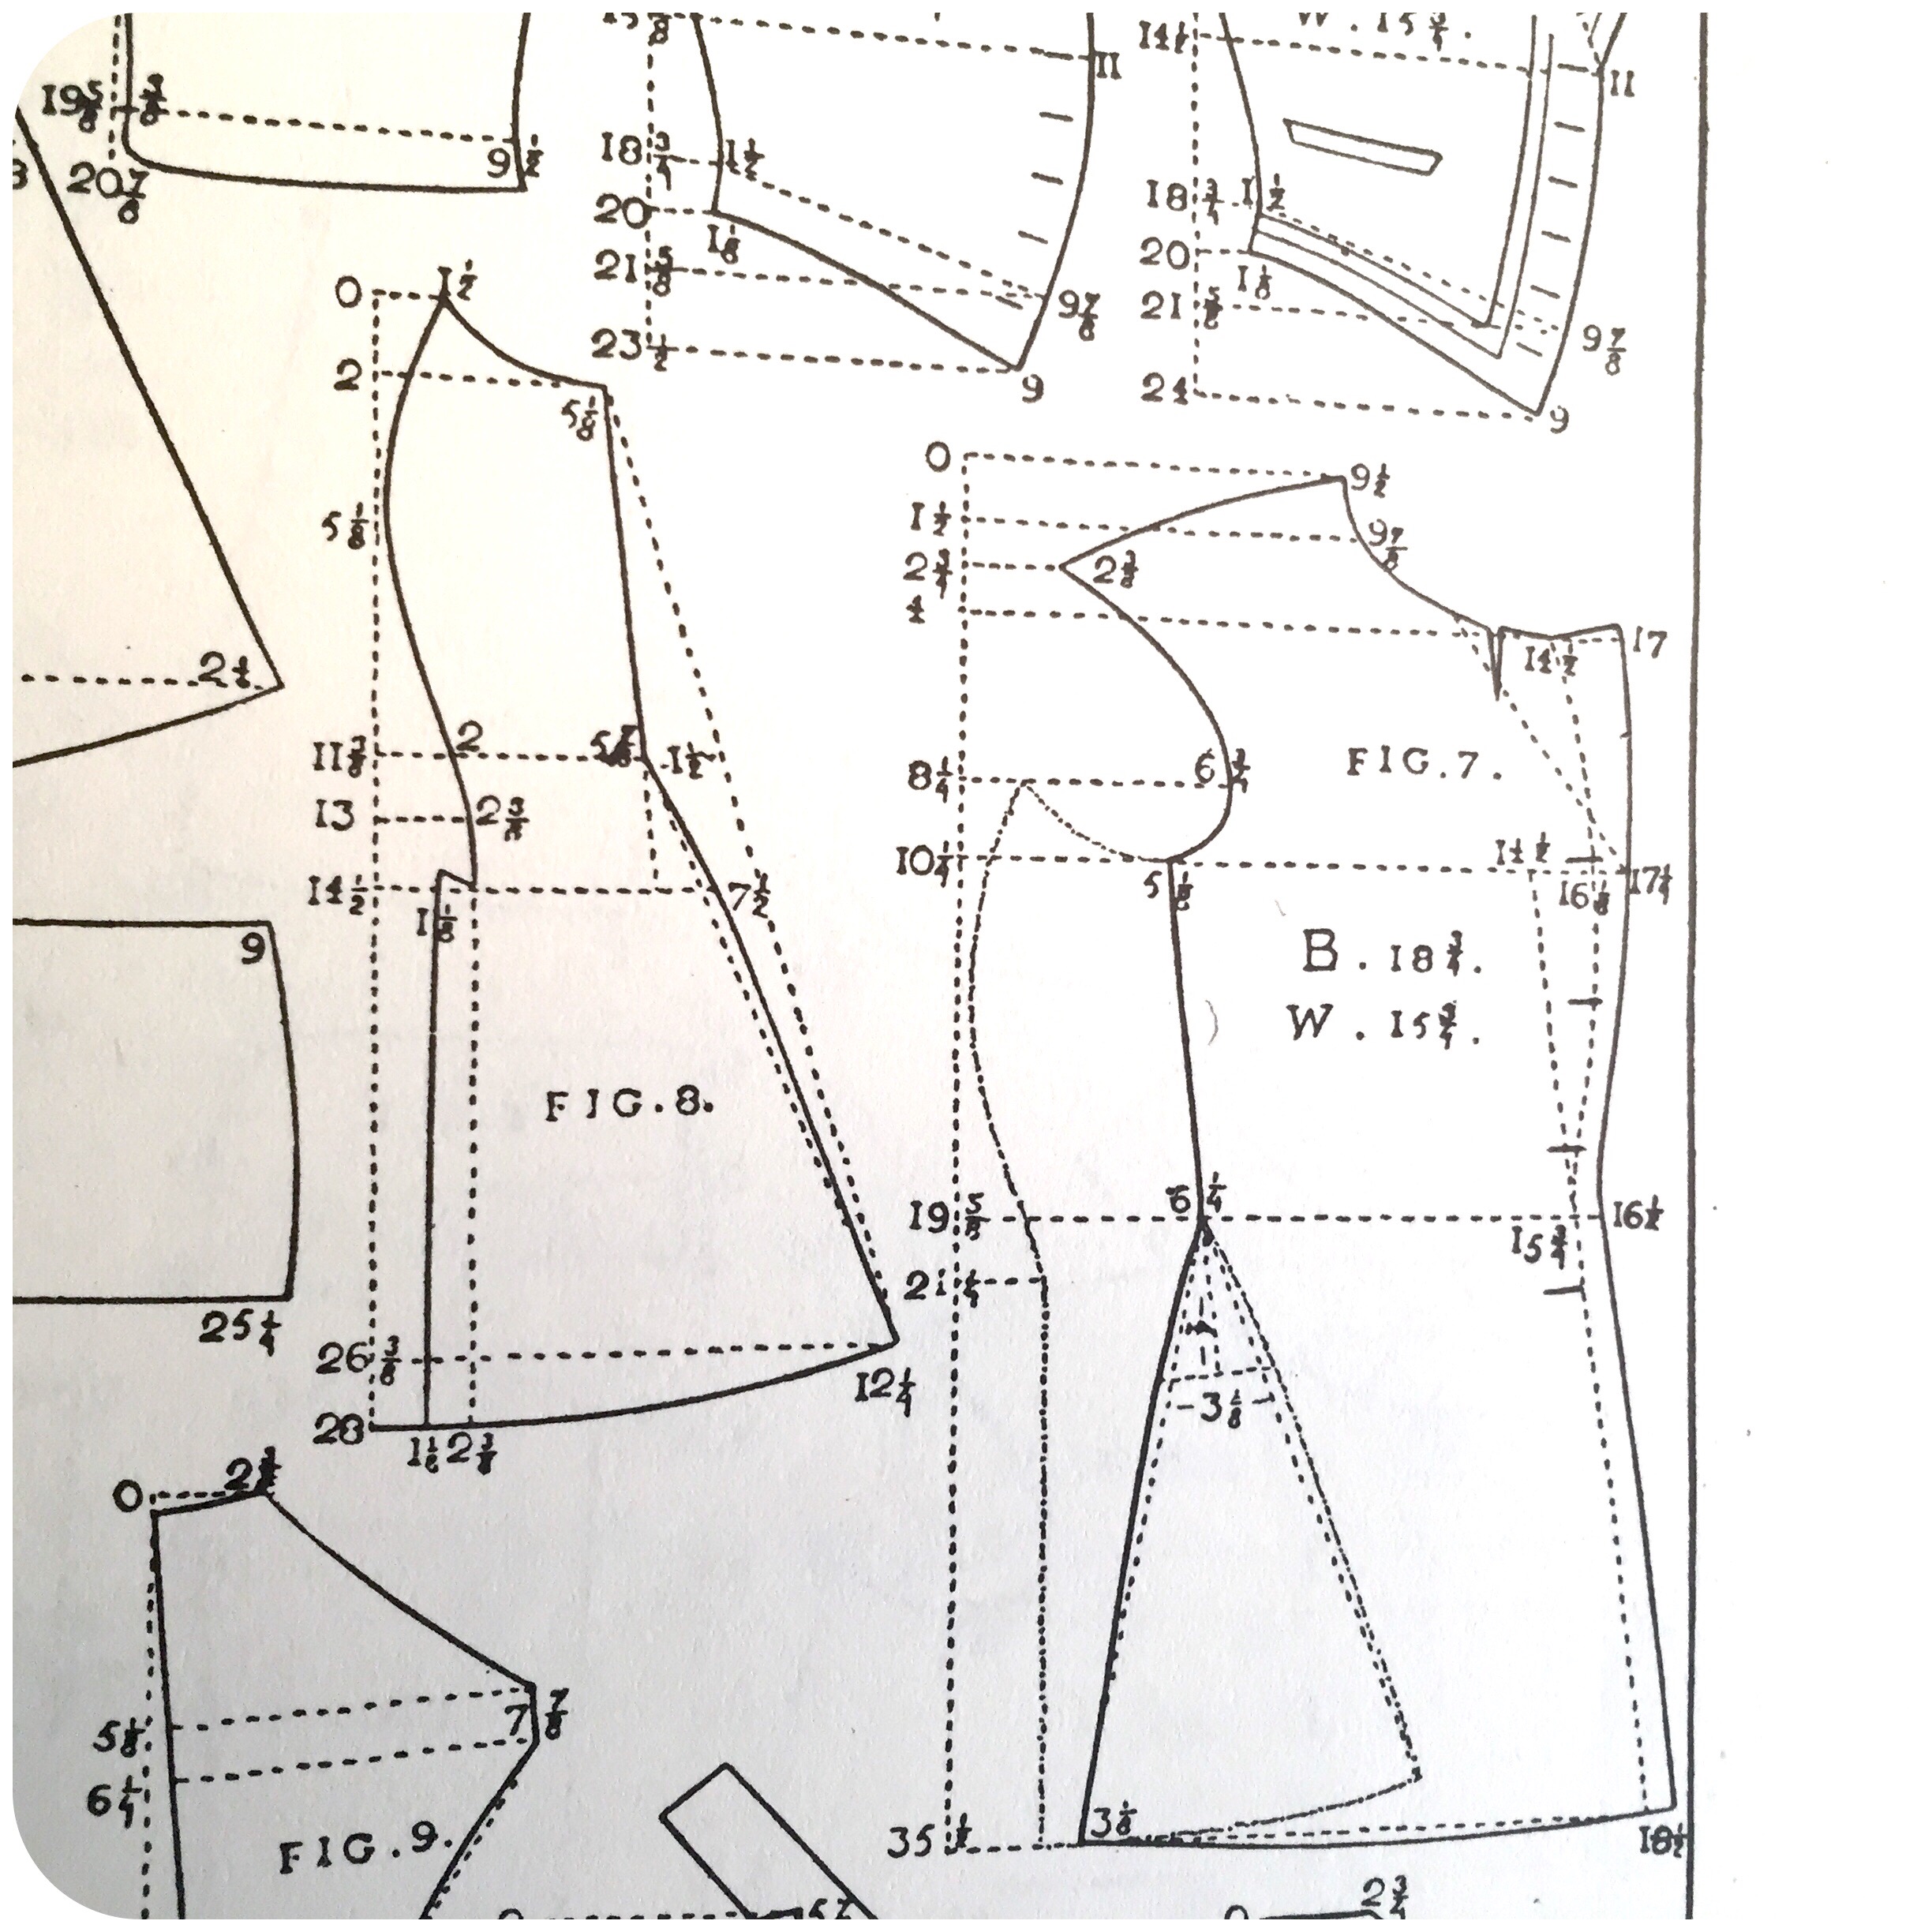
Here you can see that the center line is drawn at the outside of the pattern, and the measurements start at the top with a zero (0), and then counts downwards first, and then continues out to the right side. With all the measurements continuously marked.
Let’s try that! See here below, and try to draw your own pattern pieces!
 Here are two pattern pieces presented!
1. The Pocket Flap. Start at the top and draw the line downwards along the A direction and place the measurements 0 (zero), 4 and 6 cm (measured continuously).
Then draw the lines to the left along the B direction. Place 15 cm on the top line. Then also place 15 cm on the next line. And finally place 7,5 cm on the lowest line. Finish off with connecting all the markings with a nice outline. Preferably use a ruler. Yes! A pocket flap! And in the exact right size. Without the use of a computer program. Congratulations! You did it!
2. The Yoke. Now it’s time for you to practice! Try to make your very own pattern piece by using the diagram above. Take your time and make it neat and proper. And then there will be more to practice on tomorrow!

Today’s combination of the Thousand Days Of Hope And Glory project – the 26th day. Here you can clearly see the pocket flap that you just made! Fantastic, right? And you can see a tiny little bit of the back yoke right up at the shoulder, just next to the collar!
See you tomorrow! And good luck with your constructions!
– Sten Martin / DTTA
__________
If you enjoyed this content, feel free to support us by sharing this article, subscribe to one or two of our different platforms with informative content on tailoring and design, or, by just donating a sum. As a small independent company, we’re always greatful for your support!
If you would like to comment, ask questions or suggest upcoming topics, remember to log in with your subscription code. See you over there!